Conquering the challenges of low-light photography while traveling opens up a world of creative possibilities. From capturing the vibrant glow of city nightlife to the subtle beauty of moonlit landscapes, mastering these techniques transforms ordinary travel snapshots into evocative works of art. This guide explores essential gear, camera techniques, post-processing strategies, and composition tips to help you capture stunning images even when the light fades.
We’ll delve into the technical aspects, such as optimizing ISO, aperture, and shutter speed, and explore the practicalities of using tripods and various lenses in diverse travel scenarios. Furthermore, we’ll uncover creative approaches to utilizing available light sources and enhancing your images through effective post-processing techniques. Finally, we’ll discuss essential travel hacks for photographers, including packing, gear protection, and battery management, ensuring you’re prepared for any photographic adventure.
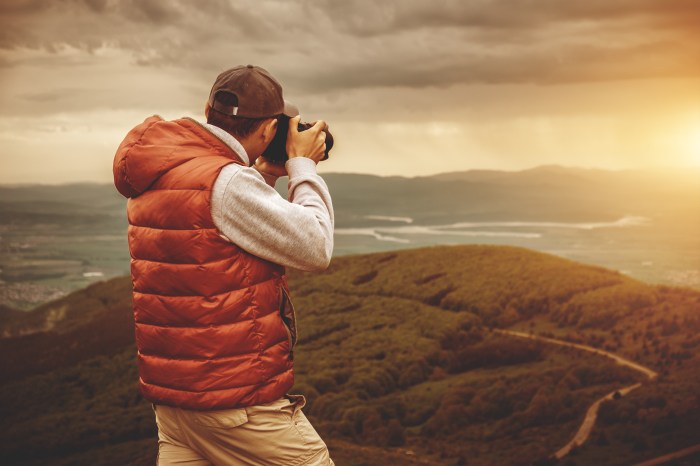
Essential Gear for Low-Light Travel Photography
Capturing stunning images in low-light conditions while traveling requires careful consideration of your equipment and settings. Understanding the interplay between your camera’s settings and the right lens is crucial for achieving sharp, well-exposed photographs, even when the light is scarce. This section details the essential gear and techniques to help you master low-light travel photography.
Ideal Camera Settings for Low-Light Photography
The key to successful low-light photography lies in mastering the exposure triangle: ISO, aperture, and shutter speed. These three settings work together to determine the brightness of your image. Finding the right balance is essential for avoiding blurry images or excessive noise.Increasing the ISO boosts the camera’s sensitivity to light. Higher ISO values allow you to use faster shutter speeds, preventing motion blur, but they also introduce digital noise (grain) into your images.
A good starting point is to experiment with ISO values between 800 and 3200, depending on your camera’s capabilities and the available light. Going beyond 6400 often results in significant noise, especially in older cameras.The aperture, represented by f-numbers (e.g., f/2.8, f/4, f/5.6), controls the amount of light entering the lens. A wider aperture (smaller f-number) lets in more light, resulting in a shallower depth of field (blurred background).
A narrower aperture (larger f-number) lets in less light, resulting in a greater depth of field (more of the scene in focus). For low-light photography, a wide aperture (e.g., f/2.8 or f/1.4) is often preferred to maximize light intake. Shutter speed determines how long the camera’s sensor is exposed to light. Slower shutter speeds allow more light to reach the sensor, but they increase the risk of motion blur, especially if you’re handholding the camera.
To avoid blur, you’ll need a sufficiently fast shutter speed, which often necessitates a higher ISO or wider aperture. For example, a combination of f/2.8 and ISO 3200 might allow for a shutter speed of 1/60th of a second, sufficient to handhold in many situations. However, in extremely low light, you might need a slower shutter speed, necessitating a tripod.
Tripod Use in Low-Light Travel Photography
Using a tripod is highly beneficial in low-light situations. It eliminates camera shake, allowing for much slower shutter speeds without introducing motion blur. This enables you to use lower ISO settings, resulting in cleaner, less noisy images. However, carrying a tripod can be cumbersome, especially during travel. Consider a lightweight and compact travel tripod if portability is a priority.
In some travel situations, finding a stable surface to rest your camera on (a wall, a rock, etc.) can serve as a makeshift tripod.
Lens Selection for Low-Light Photography
Choosing the right lens is crucial for capturing quality images in low light. Different lenses offer varying levels of light-gathering capabilities and image quality.
| Lens Type | Strengths | Weaknesses | Low-Light Suitability |
|---|---|---|---|
| Prime Lens (e.g., 35mm f/1.4, 50mm f/1.8) | Wider maximum aperture, sharper images, generally smaller and lighter | Fixed focal length, limited versatility | Excellent |
| Zoom Lens (e.g., 24-70mm f/2.8) | Versatility in focal length, good image quality | Usually larger and heavier, slower maximum aperture than prime lenses | Good |
| Fast Telephoto Lens (e.g., 70-200mm f/2.8) | Excellent for reaching distant subjects, relatively fast aperture | Very large and heavy, expensive | Good, but portability may be a challenge |
| Wide-Angle Lens (e.g., 14-24mm f/2.8) | Excellent for landscapes and cityscapes, often fast maximum aperture | Can be expensive, susceptible to distortion at wider focal lengths | Good |
Mastering Camera Techniques in Low Light

Low-light photography presents unique challenges, but mastering a few key techniques can significantly improve your results. Understanding how to focus accurately, utilize image stabilization, and creatively employ available light sources are crucial for capturing stunning images even when the light is scarce.
Focusing Techniques for Sharp Images
Achieving sharp focus in low light is paramount. Autofocus systems often struggle in these conditions, so understanding different autofocus modes and the benefits of manual focusing is essential. In low light, the camera’s autofocus sensor may have difficulty acquiring enough light to accurately determine focus. This can lead to blurry or out-of-focus images.Autofocus modes like continuous autofocus (AF-C) are generally less reliable in low light than single-servo autofocus (AF-S), which locks focus on a single point.
However, even AF-S can struggle. Manual focus, while requiring more skill and patience, often yields the most reliable results in low-light situations. Using the camera’s live view function with magnification can greatly aid manual focusing, allowing for precise adjustments. Focusing on a bright element within the scene, and then recomposing, can also be a very effective strategy.
Image Stabilization Techniques
Image stabilization is critical in low light photography to counteract camera shake, which becomes more pronounced with slower shutter speeds often needed in dim conditions. Modern cameras offer various image stabilization solutions. In-camera image stabilization (IBIS) works by moving the sensor to compensate for camera shake, while lens-based image stabilization (IS or VR) uses elements within the lens itself to achieve the same effect.
Both are effective, but combining both IBIS and lens-based IS can result in superior image stabilization. For example, using a tripod completely eliminates camera shake, and is the most reliable method for extremely low light situations. A tripod allows the use of even longer exposure times.
Creative Use of Available Light Sources
Streetlights, shop windows, and even moonlight can be transformed into powerful creative tools in low-light photography. These light sources, while often not ideal in terms of evenness and color temperature, can add character and drama to your images.For instance, a streetlight can be used as a rim light, creating a dramatic silhouette against a darker background. Imagine a lone figure walking down a rain-slicked street, their Artikel highlighted by the warm glow of a streetlamp.
Similarly, the light from a shop window can be used to illuminate a subject, casting interesting shadows and highlights. Consider photographing a person standing near a brightly lit shop window at night, their face partially illuminated, creating a moody and atmospheric portrait. Moonlight, though subtle, can add a beautiful ethereal quality to landscapes. A long exposure photograph of a moonlit landscape will capture the subtle details and textures of the scene, highlighting the silver glow of the moon.
Post-Processing for Low-Light Images
Post-processing is crucial for rescuing low-light images and transforming them from noisy, dull snapshots into vibrant, detailed photographs. Effective editing techniques allow you to recover information lost in the shadows and highlights, resulting in a significantly improved final product. This section details the essential steps involved in enhancing your low-light photography through post-processing software.
Noise Reduction Techniques
Noise, the grainy appearance often found in low-light images, is a consequence of the camera sensor working in challenging conditions. Several techniques within photo editing software can effectively mitigate this issue. Most software packages offer noise reduction tools that work by intelligently analyzing the image and smoothing out the grain while preserving detail. It’s important to use these tools judiciously, as over-application can lead to a loss of fine detail and a softening of the image.
A subtle approach is generally best. For example, in Adobe Lightroom, the “Luminance Noise Reduction” and “Detail Noise Reduction” sliders offer granular control, allowing for targeted noise reduction in specific areas. In Photoshop, the “Reduce Noise” filter offers similar functionality. Experimentation and careful observation are key to finding the optimal balance between noise reduction and detail preservation.
A before-and-after comparison will reveal the impact of the noise reduction, showing a reduction in grain without excessive blurring. The before image would show noticeable grain, while the after image would display a smoother texture with retained sharpness.
Sharpening Techniques
Low-light images often appear softer than their well-lit counterparts due to factors like higher ISO settings and smaller apertures. Sharpening techniques help to restore the crispness and detail lost in the process. However, it is important to note that over-sharpening can introduce artifacts, such as halos around edges. Again, a subtle approach is recommended. Many software packages offer tools like “Unsharp Mask” or “Smart Sharpen,” which allow you to adjust parameters such as the amount, radius, and threshold.
The “amount” controls the intensity of the sharpening, the “radius” determines the area affected, and the “threshold” specifies the contrast difference required for sharpening to be applied. The “Unsharp Mask” in Photoshop, for example, allows for precise control over these parameters, enabling a targeted sharpening effect without introducing unwanted artifacts. A comparison between a before and after image would show the improved definition and sharpness in the after image, without the appearance of artificial halos or exaggerated edges.
Exposure, Contrast, and White Balance Adjustments
Correcting exposure, contrast, and white balance are fundamental steps in post-processing low-light images. Often, low-light shots will appear underexposed and lack contrast. Adjusting the exposure slider will brighten the overall image, while the contrast slider will enhance the difference between light and dark areas. White balance correction ensures that the colors in the image are accurate and natural.
Incorrect white balance can lead to images with a color cast (e.g., a yellowish or bluish tint). Most software provides tools for adjusting white balance using presets (like “daylight,” “shade,” “tungsten”) or by manually adjusting the color temperature and tint. A before-and-after comparison will show a dramatic improvement, with the before image displaying dull colors and low contrast, and the after image exhibiting vibrant, accurate colors and improved detail.
Recovering Detail in Shadows and Highlights
Low-light images often suffer from a lack of detail in the shadows and highlights. Software tools like “Shadows” and “Highlights” sliders (found in programs like Lightroom and Photoshop) allow you to recover this lost detail. These tools work by selectively adjusting the brightness and contrast in the shadows and highlights, respectively. It is crucial to avoid over-correction, which can lead to unnatural-looking results.
A gradual approach, making small adjustments and carefully observing the results, is recommended. For example, in Adobe Lightroom, the “Shadows” slider can be used to brighten dark areas, revealing hidden detail without introducing noise. Similarly, the “Highlights” slider can be used to recover detail in overexposed areas without creating a washed-out appearance. A before-and-after image comparison would reveal a significant improvement in the image’s dynamic range, with details previously hidden in the shadows and highlights now clearly visible.
The before image may show crushed blacks and blown-out highlights, whereas the after image will show a wider range of tones and details throughout the image.
Travel Photography Composition in Low Light
Low light presents unique challenges for photographers, but it also unlocks creative opportunities. Mastering composition in these conditions is key to capturing evocative and impactful images. By understanding how to leverage available light and employing specific compositional techniques, you can transform dimly lit scenes into compelling visual narratives. This section will explore effective compositional strategies for low-light travel photography.
Leading Lines and Silhouettes in Low-Light Photography
Leading lines, such as roads, fences, or rivers, naturally guide the viewer’s eye through the image, creating depth and visual interest. In low light, these lines can be particularly effective, especially when accentuated by artificial light sources or the glow of a setting sun. Silhouettes, created by backlighting a subject, can also add drama and mystery. The absence of detail focuses attention on the subject’s shape and form, enhancing the overall mood.
For example, imagine a lone figure silhouetted against the vibrant glow of a city skyline at dusk; the contrast between the dark figure and the bright background immediately captures attention and creates a powerful visual statement. Another example could be a winding path leading towards a dimly lit temple, with the path acting as a leading line drawing the viewer’s eye towards the mysterious structure.
The lack of detail in the low light enhances the sense of mystery and intrigue.
Utilizing Light and Shadow to Create Mood and Atmosphere
Light and shadow are fundamental elements in photography, and their interplay becomes even more critical in low-light conditions. Strategic use of light sources can dramatically alter the mood and atmosphere of an image. For instance, a single streetlamp illuminating a cobblestone street can create a sense of intimacy and nostalgia, while a brightly lit window in a dark building might suggest warmth and hope.
Conversely, deep shadows can add suspense or mystery, while strategically placed highlights can draw the viewer’s attention to specific details. Consider a composition featuring a dimly lit alleyway, where the strong contrast between light and shadow creates a sense of suspense. The limited light focuses the viewer’s attention on specific elements, such as a brightly lit doorway or a mysterious figure in the shadows.
Alternatively, a photograph of a bustling night market, with the warm glow of lanterns casting shadows on the faces of the vendors and shoppers, creates a vibrant and lively atmosphere.
Choosing Compelling Viewpoints and Angles in Low Light
Selecting the right viewpoint and angle is crucial for effective low-light composition. A low vantage point can emphasize the scale of a building or landscape, while a high vantage point can provide a broader perspective and highlight the interplay of light and shadow. Experiment with different angles to find the most compelling perspective. A step-by-step guide to choosing viewpoints in low light might involve:
- Assess the Scene: Carefully observe the available light sources and how they illuminate the scene. Look for areas with interesting contrasts of light and shadow.
- Experiment with Angles: Try shooting from different heights and angles to find the most visually appealing perspective. Consider shooting from ground level to emphasize the scale of a building or from a higher vantage point to capture a wider scene.
- Consider the Background: Ensure the background complements the subject and doesn’t distract from the main focus. In low light, simplifying the background is often beneficial.
- Utilize Leading Lines: Identify and utilize natural leading lines to guide the viewer’s eye through the image towards the main subject.
- Refine Composition: Use the rule of thirds or other compositional guidelines to create a balanced and visually appealing image.
Travel Hacks for Photographers
Traveling with photography equipment can be challenging, but with smart planning and a few clever tricks, you can streamline the process and ensure your gear arrives safely and ready to capture stunning images. This section offers practical tips and strategies for efficient packing, protection, and power management, transforming potential travel headaches into smooth photographic adventures.
Efficient packing and gear protection are crucial for successful travel photography. Proper preparation minimizes stress and maximizes your ability to focus on capturing memorable moments.
Packing Camera Equipment Efficiently
Careful organization is key to efficient packing. Consider using specialized camera bags designed with dividers and compartments to keep your gear secure and prevent damage from jostling. Think of your bag like a puzzle; every item should have a designated space.
- Utilize packing cubes to compress clothing and create dedicated spaces for camera equipment within your main luggage.
- Wrap fragile items like lenses in bubble wrap or soft cloths for added protection.
- Carry your most essential gear – camera body, a favorite lens, and batteries – in a readily accessible smaller bag, separate from checked luggage.
- Use lens pouches or individual cases to protect individual lenses from scratches and impacts.
- Consider a lightweight tripod that folds down compactly, saving space without compromising stability.
Protecting Camera Gear During Travel
Protecting your valuable equipment from the rigors of travel is paramount. This involves considering both the journey itself and the conditions at your destination.
- Avoid checking your camera bag as checked luggage; it’s much more vulnerable to damage and loss.
- Use a rain cover or waterproof bag to protect your gear from unexpected showers or spills.
- In hot or cold climates, consider using a camera bag with thermal insulation to protect your equipment from extreme temperatures.
- When traveling to areas with high humidity, consider using silica gel packets to absorb moisture and prevent mold growth.
- Be mindful of your surroundings and avoid leaving your gear unattended in crowded or unsecured areas.
Managing Camera Batteries and Storage Space
Power management and storage are often overlooked aspects of travel photography, yet they significantly impact your ability to shoot. Planning ahead ensures you’re always ready to capture the perfect shot.
- Carry extra batteries; a fully charged spare is always a good idea, especially on longer trips.
- Invest in a portable power bank to recharge batteries on the go, especially if you’re in areas with limited access to electricity.
- Utilize cloud storage services like Dropbox or Google Photos to regularly back up your photos, freeing up space on your memory cards.
- Empty your memory cards regularly to a laptop or external hard drive to avoid running out of space.
- Consider using high-capacity memory cards to minimize the frequency of card changes.
Travel Insurance Considerations for Photographers
Protecting your valuable photography equipment while traveling is crucial. Standard travel insurance policies often have limitations regarding the coverage of electronics and specialized equipment. Therefore, it’s vital to carefully review your policy and consider supplemental coverage if necessary to ensure adequate protection for your investment.Travel insurance policies addressing lost or damaged camera equipment typically include clauses specifying coverage limits, exclusions, and the claims process.
These clauses often define what constitutes “loss” or “damage,” outlining acceptable proof of ownership and the valuation method used to determine compensation. Furthermore, they might detail specific circumstances that are not covered, such as damage caused by negligence or pre-existing conditions. The policy will also explain the necessary steps to take in the event of a claim, including reporting timelines and required documentation.
Specific Clauses Regarding Camera Equipment Coverage
Insurance policies vary significantly. However, common clauses related to camera equipment coverage include details on the maximum compensation amount for a single item or the total coverage for all electronics. Some policies might have a deductible, meaning you’ll pay a certain amount before the insurance company covers the rest. Exclusions often involve pre-existing damage, loss due to war or terrorism, and intentional damage.
The policy should clearly state the required documentation for filing a claim, such as purchase receipts, repair estimates, and police reports (in case of theft). For example, a policy might state a maximum coverage of $2,000 for electronic equipment, with a $100 deductible and an exclusion for damage caused by water submersion without a waterproof case.
Comparison of Travel Insurance Plans
When comparing travel insurance plans, focus on the specific coverage amounts for photography equipment. Look beyond the overall policy cost and consider the value of your gear. Some plans offer specialized coverage for electronics or professional equipment, often at an additional cost. Consider comparing policies from different providers, such as World Nomads, Allianz Travel, and SafetyWing, paying close attention to their coverage limits, deductibles, and exclusions.
For instance, one policy might offer $5,000 of coverage for electronics with a $250 deductible, while another might offer $10,000 with a $500 deductible, but exclude coverage for drones. Choosing the right plan depends on the value of your equipment and your risk tolerance.
Filing a Claim for Damaged or Lost Equipment
The process of filing a claim usually involves promptly reporting the incident to your insurance provider, typically within a specified timeframe Artikeld in your policy. You’ll then need to gather all necessary documentation, including proof of purchase, repair estimates (if applicable), and a police report (if theft or loss occurred). Submitting clear and concise photographs of the damaged or lost equipment, along with any other relevant evidence, is essential.
The insurance company will review your claim and determine the amount of compensation based on the policy terms and the provided documentation. It’s advisable to keep detailed records of all communication with the insurance provider throughout the claims process. Failure to promptly report the incident or provide the necessary documentation could lead to delays or denial of the claim.
Urban Escapes and Photography Opportunities
Urban environments offer a wealth of photographic opportunities, especially in low-light conditions. The interplay of artificial and ambient light creates dramatic scenes and unique atmospheres, transforming familiar streets into captivating canvases. The challenge lies in harnessing these conditions to capture compelling images.The dynamic nature of urban spaces, coupled with the limitations of low light, requires careful planning and execution.
This section explores several ideal locations and themes for low-light urban photography, alongside practical tips for safe and successful shooting.
Unique Urban Locations for Low-Light Photography
Several urban locations provide exceptional opportunities for low-light photography. These locations often feature a blend of architectural marvels, vibrant street life, and captivating ambient lighting, creating a unique visual experience.
For example, consider a bustling night market in a Southeast Asian city. The vibrant colors of food stalls, the warm glow of lanterns, and the movement of people create a dynamic scene ripe for capturing long exposures to illustrate the energy of the location. Alternatively, a historic European city center at dusk, with its ancient cobblestone streets and illuminated buildings, offers a chance to capture the city’s rich history and architectural details in a moody and atmospheric light.
The juxtaposition of old and new, often highlighted by modern streetlights against ancient buildings, provides compelling contrasts. Finally, a modern city skyline at night, with its towering skyscrapers and glittering lights reflected in puddles on the street, presents an opportunity for capturing abstract compositions, playing with light trails and reflections to create a visually stunning image. The contrast between the cold, hard lines of the buildings and the warm glow of the lights offers a unique aesthetic.
Urban Photography Themes Suitable for Low Light
Low-light conditions lend themselves beautifully to specific urban photography themes. These themes leverage the inherent qualities of low light to create a specific mood or atmosphere within the image.
Nightlife photography, for instance, captures the energy and vibrancy of urban nightlife. This could include images of crowded bars, illuminated streets, or people enjoying themselves in the evening. Street scenes at night offer a different perspective, showcasing the quieter moments and hidden details of the urban landscape. Architectural photography in low light allows for the highlighting of textures and shapes, emphasizing the structure and form of buildings in a dramatic way.
The use of long exposures can also blur the movement of traffic, creating interesting light trails that add to the composition. Finally, capturing portraits in low light, using creative lighting techniques, can produce images with a unique mood and atmosphere.
Tips for Safe Urban Low-Light Photography
Navigating urban environments at night requires careful consideration of safety. Prioritize your safety and well-being while capturing your images.
Always be aware of your surroundings and avoid isolated or poorly lit areas. Shoot in well-populated areas, and let someone know your plans. Consider using a buddy system. Carry a fully charged phone and let someone know your whereabouts. Be mindful of your equipment and keep it secure.
Avoid drawing unnecessary attention to yourself or your expensive equipment. Finally, respect the privacy of others and be mindful of local laws and regulations regarding photography.
Vacation Packages and Photography
Planning a vacation that caters to your passion for photography, especially low-light photography, requires careful consideration of destination, activities, and the overall package structure. A well-designed trip can significantly enhance your photographic skills and create lasting memories. This section explores designing such packages, comparing their suitability, and integrating photography into existing travel plans.
Sample Low-Light Photography Vacation Package
This sample package focuses on capturing the magic of cities at night. The duration is seven days, but it can be adjusted to suit individual needs.Destinations: Tokyo, Japan, and Hong Kong. Both cities offer diverse architectural styles, vibrant nightlife, and ample opportunities for capturing stunning low-light images. Tokyo’s neon-lit streets and traditional temples at night offer a unique contrast, while Hong Kong’s skyscrapers and harbor create dramatic backdrops.Activities:
- Day 1-2: Tokyo – Explore Shinjuku Gyoen National Garden during the golden hour, capturing the interplay of light and shadow. Evening photography sessions focusing on the illuminated skyscrapers and vibrant Shibuya crossing.
- Day 3-4: Tokyo – Workshops on night photography techniques, focusing on long exposures and light painting. Guided photography tour of Tokyo’s less-visited temples and shrines at night.
- Day 5-6: Hong Kong – Capture the iconic skyline from Victoria Peak at night. Explore the vibrant street markets and capture the energy of the city’s nightlife. Photography session focused on the harbor and its illuminated junks.
- Day 7: Hong Kong – Final photography session, perhaps capturing the sunrise over the city before departure.
The package includes accommodation in centrally located hotels, transportation between destinations, and guided photography tours. Optional add-ons could include specialized equipment rental, post-processing workshops, or private photography tutoring.
Comparison of Vacation Packages for Photography Enthusiasts
Different vacation packages cater to varying photography styles and skill levels. For instance, a wildlife photography tour in Tanzania will differ vastly from a cityscape photography tour in New York City. Consider these factors when choosing:
- Destination: The location’s light conditions, subject matter, and accessibility greatly influence the type of photography possible. A trip to Iceland offers unique opportunities for capturing the Northern Lights, while a trip to the Amazon rainforest focuses on wildlife photography.
- Activities: Guided tours, workshops, and access to unique locations are essential for enhancing photographic opportunities. Some packages include expert instruction, while others focus on independent exploration.
- Accommodation: Choosing accommodation that offers convenient access to shooting locations, appropriate amenities for storing and maintaining equipment, and comfortable workspaces is vital.
- Cost: Prices vary significantly depending on the destination, duration, and included activities. Budget accordingly, ensuring the package aligns with your financial capabilities.
Integrating Photography into Existing Vacation Plans
Even if you’re not on a dedicated photography tour, you can easily integrate photography into your existing vacation plans. Prioritize locations known for stunning lighting conditions – golden hour and blue hour offer magical lighting for landscape and street photography.Research your destination beforehand to identify photogenic spots. Use online resources like Flickr and Instagram to find locations favored by other photographers.
Plan your itinerary to incorporate these locations during optimal lighting times. Carry your camera with you at all times and be ready to seize unexpected photographic opportunities. Consider packing a small tripod for low-light situations. Embrace spontaneity and enjoy the process of capturing your journey through your lens.
Venture Capital and Travel Photography (A tangential exploration)
The intersection of venture capital and travel photography might seem unconventional, but the industry is ripe with opportunities for innovative startups. The increasing demand for high-quality visual content, coupled with technological advancements, creates a fertile ground for businesses leveraging technology and creative talent to redefine the travel photography experience. This exploration examines potential business models, challenges, and the role of technology in attracting investment.The travel photography industry presents a unique landscape for venture capitalists.
While traditional photography businesses often struggle with scalability, innovative models can address this. The potential for high returns is linked to the global reach of the travel industry and the consistently high demand for compelling visual content. However, the competitive nature of the market and the dependence on external factors like travel trends and economic conditions present significant challenges.
Potential Business Models Attracting Venture Capital
Several business models within travel photography could attract significant venture capital. One promising area is the development of sophisticated AI-powered photo editing and enhancement tools specifically tailored for travel photography. Imagine a platform that automatically optimizes lighting, color correction, and even scene composition, saving photographers significant post-processing time. Another model could involve creating curated travel photography experiences, combining professional photography tours with high-end accommodation and bespoke itineraries, targeting affluent travelers.
A third model could focus on developing a robust platform connecting travel photographers with clients, offering a streamlined process for booking shoots, managing contracts, and ensuring secure payments. This could potentially disrupt the existing freelance market by providing much-needed structure and infrastructure. Finally, the creation of a high-quality stock photography platform specializing in unique travel imagery could attract investors, given the continuous need for such content in marketing and media.
Challenges for Travel Photography Startups Seeking Funding
Securing venture capital for a travel photography startup presents unique challenges. The initial investment required for equipment, travel, and marketing can be substantial. Demonstrating a clear path to profitability and scalability is crucial, requiring a well-defined business plan with realistic financial projections. Competition is fierce, with established photographers and agencies already holding significant market share. Furthermore, the industry is subject to external factors such as global travel restrictions and economic downturns, making long-term projections inherently risky.
Investors will want to see a strong team with proven experience in both photography and business management, a well-defined target market, and a compelling value proposition that differentiates the startup from existing competitors.
Technology’s Role in Enhancing the Travel Photography Experience and Attracting Investment
Technology plays a pivotal role in attracting investment in the travel photography industry. Innovative solutions that streamline workflows, enhance image quality, or create new revenue streams are highly attractive to venture capitalists. Examples include AI-powered editing tools, as mentioned previously, drone photography services offering unique perspectives, virtual reality (VR) and augmented reality (AR) experiences that immerse viewers in travel destinations, and personalized photo book creation services that leverage advanced printing and design technologies.
The use of blockchain technology for copyright protection and secure image licensing could also be a significant draw for investors. Furthermore, integrating social media strategies and leveraging influencer marketing are crucial for building brand awareness and demonstrating market traction, which are key factors for securing funding.
Ultimately, mastering low-light travel photography is about embracing the limitations and turning them into artistic opportunities. By understanding your equipment, mastering essential techniques, and thoughtfully planning your compositions, you can capture breathtaking images that tell compelling stories, even in challenging lighting conditions. Remember to experiment, be patient, and enjoy the creative journey—the rewards are well worth the effort.
Q&A
What is the best camera for low-light photography?
There’s no single “best” camera. Full-frame cameras generally perform better in low light due to larger sensors, but high-quality mirrorless and even some advanced DSLRs can produce excellent results. Consider your budget and desired features.
How do I avoid blurry photos in low light?
Use a tripod for stability, select a higher ISO (within reason to manage noise), increase your aperture (lower f-stop number), and use a faster shutter speed if possible. Image stabilization features on your camera or lens are also helpful.
What software is best for editing low-light photos?
Adobe Lightroom and Photoshop are popular choices, offering extensive tools for noise reduction, sharpening, and exposure adjustments. Many other excellent options exist, both paid and free, depending on your needs and budget.
How can I improve my composition in low light?
Focus on leading lines to guide the viewer’s eye, utilize silhouettes for dramatic effect, and experiment with light sources to create mood and atmosphere. Pay attention to contrast and shadows.


