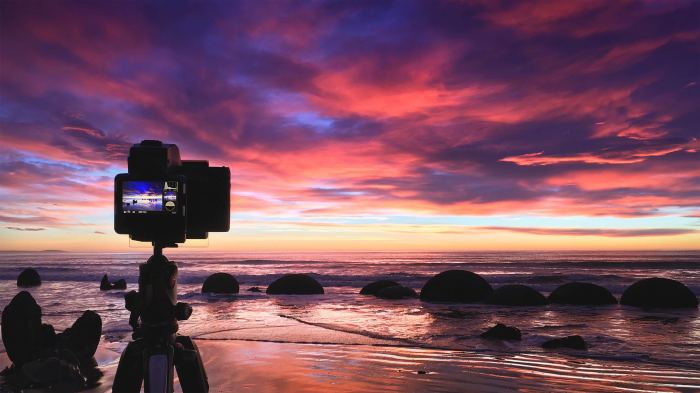
Capture breathtaking landscapes, vibrant street scenes, and incredible wildlife—all while honing your photographic skills. This guide delves into the exciting world of travel photography tours and workshops, offering insights into choosing the perfect experience for your skill level and photographic aspirations. Whether you’re a seasoned professional or a budding enthusiast, we explore diverse destinations, workshop types, essential gear, and valuable travel tips to ensure an unforgettable and enriching journey.
From selecting the ideal location and time of year to understanding the costs involved and mastering advanced techniques, we provide a comprehensive overview to empower you to plan and execute a successful photography adventure. We’ll cover everything from essential gear and travel hacks to visa requirements and insurance considerations, ensuring a smooth and rewarding experience from start to finish.
Top Travel Photography Tour Destinations

Choosing the right destination for a travel photography tour is crucial for capturing stunning images. The ideal location depends on your preferred photographic style and the type of scenery you wish to capture. Below, we explore five destinations renowned for their diverse photographic opportunities.
Five Top Destinations for Travel Photography Tours
Five destinations stand out for their diverse photographic potential, each offering unique challenges and rewards for photographers of all skill levels. These locations provide a variety of subjects, from dramatic landscapes to vibrant street scenes and fascinating wildlife.
| Destination | Best Time to Visit | Unique Photographic Opportunities | Recommended Gear |
|---|---|---|---|
| Iceland | June-August (Midnight Sun) or September-October (Northern Lights) | Dramatic landscapes, glaciers, waterfalls, ice caves, Northern Lights (Aurora Borealis), unique geological formations. Opportunities for landscape, astrophotography, and even some wildlife photography (puffin colonies). | Wide-angle lens (16-35mm), telephoto lens (70-200mm or longer for wildlife), tripod, polarizing filter, ND filters, sturdy camera bag suitable for varied weather conditions. |
| Tanzania, Africa | June-October (Dry season) | Abundant wildlife photography opportunities in national parks like Serengeti and Ngorongoro Crater. Landscape photography showcasing the vast African plains and diverse ecosystems. | Telephoto lenses (100-400mm or longer), a high-quality teleconverter, a camera body with fast autofocus, a sturdy tripod, and a lens cleaning kit. Consider a monopod for easier mobility in the safari vehicles. |
| Kyoto, Japan | Spring (cherry blossoms) or Autumn (fall foliage) | Stunning temples and shrines, traditional gardens, vibrant street scenes, geishas, and bustling markets. Opportunities for architectural, street, and cultural photography. | Wide-angle and standard lenses (24-70mm), a fast prime lens (e.g., 35mm f/1.4 or 50mm f/1.4) for low-light situations, a tripod for architectural shots, and potentially a polarizing filter to reduce reflections. |
| Machu Picchu, Peru | May-September (Dry season) | Iconic Inca ruins set against a breathtaking mountain backdrop. Opportunities for landscape, architectural, and travel photography, capturing the history and majesty of the site. | Wide-angle and standard zoom lenses (24-70mm), a polarizing filter to enhance colors and reduce glare, and a tripod for sharp architectural shots, especially in low light conditions within the ruins. |
| Provence, France | Spring (lavender fields) or Summer (sun-drenched landscapes) | Rolling hills, vineyards, lavender fields, charming villages, and picturesque architecture. Opportunities for landscape, architectural, and travel photography. | Wide-angle and standard lenses (24-70mm), a macro lens for close-up shots of flowers or details, a polarizing filter, and potentially a graduated neutral density filter for balancing light in landscapes. |
Photographic Styles Suited to Each Destination
The photographic styles best suited to each destination vary considerably. Iceland’s dramatic landscapes lend themselves perfectly to landscape photography and astrophotography. Tanzania’s abundant wildlife necessitates a focus on wildlife photography, while Kyoto’s cultural richness provides ample opportunities for street, architectural, and cultural photography. Machu Picchu’s historical significance calls for architectural and travel photography, and Provence’s idyllic scenery is ideal for landscape and architectural photography.
Types of Travel Photography Workshops
Travel photography workshops cater to a wide range of skill levels and interests, offering structured learning experiences to improve photographic skills in diverse travel settings. These workshops provide opportunities for both technical skill development and creative exploration, fostering a deeper understanding of visual storytelling within the context of travel. They vary significantly in their approach, duration, and target audience.
Different types of workshops address specific needs and skill levels, ensuring participants receive tailored instruction and support. This allows beginners to build a strong foundation, while advanced photographers can refine their techniques and explore specialized areas. The workshops typically include a blend of classroom instruction, practical field exercises, and individual feedback sessions.
Beginner Travel Photography Workshops
Beginner workshops focus on establishing a solid foundation in travel photography. Curriculum typically covers essential camera settings, composition techniques, and basic post-processing skills. Learning objectives include understanding exposure triangle (aperture, shutter speed, ISO), mastering basic composition rules (rule of thirds, leading lines), and familiarizing oneself with essential post-processing software such as Lightroom or Photoshop for basic adjustments like cropping, exposure correction, and sharpening.
These workshops often emphasize practical application through guided photo walks and critiques of participant’s work.
Advanced Travel Photography Workshops
Advanced workshops build upon existing skills, delving into more complex techniques and creative approaches. The curriculum often explores advanced composition techniques, specialized lighting scenarios (e.g., golden hour, blue hour), and in-depth post-processing workflows. Learning objectives include mastering advanced composition techniques (e.g., negative space, framing), understanding and utilizing advanced lighting techniques, and developing a strong personal photographic style. Participants are expected to have a good understanding of their camera and basic post-processing skills before enrolling.
These workshops may also incorporate elements of business and marketing for photographers.
Specialized Travel Photography Workshops
Specialized workshops cater to specific interests, such as wildlife photography, landscape photography, or street photography. The curriculum is tailored to the chosen niche, focusing on the specific techniques, equipment, and ethical considerations relevant to that area. Learning objectives vary depending on the specialization but might include mastering techniques specific to wildlife photography (e.g., camouflage, using long lenses), capturing stunning landscape images (e.g., using filters, understanding weather conditions), or ethically capturing street photography (e.g., respecting privacy, engaging with subjects).
These workshops often involve field trips to locations optimal for the specific niche.
The cost and duration of these workshops vary considerably depending on the instructor, location, and level of instruction.
- Beginner Workshops: Typically cost between $500-$1500 and last 2-5 days.
- Advanced Workshops: Typically cost between $1500-$3000 and last 3-7 days.
- Specialized Workshops: Typically cost between $1000-$4000+ and last 3-10 days, potentially including travel to specific locations.
Factors Influencing Tour Costs
The price of a travel photography tour can vary significantly, depending on a number of interconnected factors. Understanding these factors allows photographers to budget effectively and choose tours that best suit their needs and financial capabilities. These factors often work in concert, meaning a tour with multiple high-cost elements will naturally be more expensive.Several key elements contribute to the overall cost of a photography tour.
These include the destination’s accessibility and desirability, the duration of the tour, the expertise level of the instructors and guides, the included services and amenities, and the size and style of the tour group. Each of these elements has a direct impact on the final price.
Destination Accessibility and Desirability
The location of a photography tour significantly impacts its cost. Tours to remote, exotic locations requiring extensive travel (perhaps involving multiple flights and potentially internal travel like domestic flights or ground transport) will naturally be more expensive than those in easily accessible areas. Similarly, popular destinations known for their exceptional photographic opportunities often command higher prices due to increased demand and associated costs such as accommodation and permits.
For example, a tour to the Galapagos Islands will be considerably more expensive than a tour to a nearby national park in the continental US due to the added travel costs and unique logistical considerations.
Tour Duration
Longer tours generally cost more than shorter ones. This increase reflects the additional expenses associated with longer stays, including accommodation, meals, transportation, and potentially more specialized guide services. A ten-day tour to Iceland will naturally cost more than a three-day workshop in a nearby city. The added days translate to increased costs across all aspects of the tour.
Instructor Expertise and Group Size
The level of expertise of the instructors and guides is another major factor. Renowned photographers or specialists in niche areas (e.g., wildlife photography, astrophotography) often command higher fees, which are reflected in the tour price. Smaller group sizes, offering more personalized instruction and attention, also tend to be more expensive than larger group tours. A small group workshop led by a world-renowned wildlife photographer in Tanzania will undoubtedly be more costly than a larger group workshop led by a less experienced instructor in a more accessible location.
Included Services and Amenities
The services and amenities included in a photography tour greatly affect its cost. Tours that include accommodation in high-end hotels, private transportation, all meals, and specialized equipment rental will be significantly more expensive than those with basic accommodations and fewer inclusions. For instance, a tour that includes all meals, luxurious accommodation, and private vehicle transportation throughout will cost considerably more than a tour offering shared accommodation, self-catering options, and public transport.
Comparative Chart of Tour Price Ranges
| Tour Type | Location | Duration | Instructor Expertise | Included Services | Price Range (USD) |
|---|---|---|---|---|---|
| Beginner Landscape Photography Workshop | National Park (USA) | 3 Days | Emerging Photographer | Basic Accommodation, Some Meals | $800 – $1500 |
| Intermediate Wildlife Photography Tour | African Safari | 7 Days | Experienced Guide | Mid-Range Accommodation, All Meals, Transportation | $3500 – $6000 |
| Advanced Astrophotography Workshop | Remote Desert Location | 5 Days | World-Renowned Astrophotographer | Luxury Accommodation, All Meals, Specialized Equipment | $7000 – $12000 |
Essential Gear for Travel Photography Tours
Packing for a travel photography tour requires careful consideration of both image quality and portability. The right gear will allow you to capture stunning images while minimizing the weight and bulk you carry. Choosing versatile equipment is key to success.Choosing the right camera and lenses is paramount for travel photography. A balance between image quality and portability is crucial, as you’ll be moving frequently.
Budget considerations also play a significant role in selecting the appropriate gear.
Camera Bodies
Selecting a camera body depends largely on personal preference and budget. High-resolution full-frame cameras offer superior image quality and low-light performance, but they are often more expensive and heavier. Mirrorless cameras provide a good balance of image quality, size, and weight, making them popular choices for travel. For budget-conscious photographers, excellent results can be achieved with high-quality APS-C sensor cameras.
Many photographers successfully use older models of high-end DSLRs or mirrorless cameras, finding them cost-effective and capable of producing excellent results.
Lenses
A versatile lens kit is essential for diverse shooting scenarios encountered during travel. A wide-angle lens (e.g., 16-35mm) is ideal for landscapes and architectural shots, capturing the breadth of a scene. A standard zoom lens (e.g., 24-70mm) offers great all-around versatility, suitable for portraits, street photography, and general sightseeing. A telephoto lens (e.g., 70-200mm) allows for capturing distant subjects, wildlife, or details in tight spaces.
For budget-conscious photographers, investing in one high-quality zoom lens (such as a 24-105mm) can offer a good compromise, while prime lenses (fixed focal length) can offer superior image quality at a lower cost than zoom lenses.
Accessories
Several accessories significantly enhance the travel photography experience. A sturdy tripod is crucial for sharp images in low-light conditions or when using long exposures for landscapes or night photography. A reliable camera bag is needed to protect your equipment from damage during travel, choosing a backpack style offers better comfort for carrying heavier loads. Extra batteries and memory cards are vital, ensuring you don’t miss any photo opportunities due to power or storage limitations.
A portable external hard drive provides a secure backup for your images. Consider a lens cleaning kit to maintain the cleanliness of your optics. A polarizing filter helps reduce glare and enhance color saturation. A neutral density filter allows for creative long exposures even in bright conditions. A rain cover will protect your gear from unexpected showers.
Ideal Travel Photography Kit (Descriptive Representation)
Imagine a photographer’s kit bag: A lightweight, but sturdy, backpack comfortably carries a mirrorless camera body, three lenses (a wide-angle zoom, a standard zoom, and a telephoto zoom), extra batteries and memory cards in a protective case. A small, easily-packed tripod is tucked into a side pocket, along with a cleaning kit. A rain cover is readily accessible.
A separate, smaller bag holds a portable hard drive for backups and any personal items. The entire setup is designed for comfort and ease of use while traveling, allowing for quick access to essential equipment without compromising the protection of the gear.
Travel Hacks for Photographers
Traveling with photography gear can be challenging, but with a few smart strategies, you can streamline your process, save money, and significantly reduce the risk of damage or loss to your valuable equipment. These hacks focus on efficiency and cost-effectiveness, ensuring a smoother and more enjoyable photographic journey.
Packing for Efficient Gear Transportation
Proper packing is crucial for protecting your gear. Instead of relying solely on a bulky camera bag, consider using a combination of methods. A smaller, well-padded camera bag can hold your most frequently used items, while a dedicated rolling suitcase can accommodate larger lenses, tripods, and accessories. This distributes the weight, making transport easier and less stressful on your back.
Furthermore, utilizing packing cubes within your suitcase keeps everything organized and prevents items from shifting and potentially getting damaged during transit. Consider wrapping fragile items individually in bubble wrap or clothing for extra cushioning. A hard-shell case for your most expensive lens is a worthwhile investment for added protection against impacts.
Utilizing Travel Insurance and Gear Protection
Investing in comprehensive travel insurance is a must for any photographer. Standard travel insurance often covers lost or damaged luggage, but specialized photography insurance can provide broader coverage, including the repair or replacement of your equipment. This can be a lifesaver in case of theft, accidental damage, or even loss during transit. Documenting your gear with serial numbers and photographs before your trip is also essential for insurance claims.
Many photographers also choose to add gear protection to their homeowner’s or renter’s insurance policy.
Minimizing Carry-On Weight for Flight Travel
Airline baggage fees can significantly increase travel costs. To minimize these fees, strategically pack your carry-on bag. Prioritize essential items like your camera body, a couple of versatile lenses, and a small tripod in your carry-on. Heavier items like extra lenses, lighting equipment, and a larger tripod should be packed in your checked baggage, keeping in mind airline size and weight restrictions.
Remember that airline regulations vary, so always check the specific requirements of your airline before you travel. This reduces the risk of incurring additional charges and ensures your most valuable gear remains close at hand.
Leveraging In-Flight Gear Protection
Protecting your gear during the flight itself is just as important. Avoid placing your camera bag in overhead compartments where it’s prone to being bumped or dropped. Instead, place it under the seat in front of you, where it’s more secure and less likely to be subjected to rough handling. If your camera bag isn’t sufficiently padded, consider wrapping your camera and lenses in clothing for extra protection.
Remember to remove any batteries from your camera and place them in your carry-on separately to comply with airline regulations concerning lithium-ion batteries.
Smart Packing for Day Trips and Excursions
When embarking on day trips or excursions, you don’t need to carry your entire kit. A smaller shoulder bag or backpack containing your camera body, a versatile zoom lens, extra batteries, and memory cards will suffice for most situations. This reduces the weight and bulk you need to carry, allowing for greater mobility and freedom to explore. For longer excursions, consider a daypack with dedicated compartments to keep your gear organized and secure.
A rain cover for your bag is also a wise investment to protect your gear from unexpected showers.
Travel Insurance Considerations
Protecting your investment in a travel photography tour goes beyond just booking flights and accommodation; it necessitates comprehensive travel insurance. This is especially true for photographers, whose expensive equipment is vulnerable to loss, damage, or theft during travel. Choosing the right policy can mean the difference between a salvaged trip and a financially devastating experience.Travel insurance for photographers should prioritize coverage for photographic equipment.
Standard travel insurance policies often offer limited coverage for personal belongings, and the value of professional camera gear can easily exceed these limits. Therefore, it’s crucial to carefully review the policy’s specifics regarding equipment coverage, including details on the valuation process, the types of damage covered (e.g., accidental damage, theft, loss), and any limitations or exclusions. Consider purchasing supplemental coverage specifically for your equipment if necessary.
Types of Travel Insurance Plans and Coverage
Different travel insurance plans offer varying levels of coverage, ranging from basic policies covering medical emergencies and trip cancellations to comprehensive plans that include broader coverage for personal belongings, including expensive equipment. Basic plans might offer only limited coverage for lost or damaged equipment, perhaps capped at a few hundred dollars. Mid-range plans often increase this limit, while comprehensive plans may allow you to declare the full value of your equipment, providing more substantial protection.
For example, a basic plan might cover up to $500 worth of lost equipment, whereas a comprehensive plan could cover up to $10,000 or more, depending on the policy and declared value. Some plans even offer specific add-ons for professional equipment, providing greater peace of mind for photographers. It is important to compare several plans and their respective price points to find the optimal balance between cost and the level of protection offered.
Reading the fine print is crucial to understanding what is and isn’t covered.
Equipment Valuation and Claim Process
Accurately valuing your photographic equipment is crucial for securing adequate coverage. Before purchasing insurance, meticulously document your gear with detailed descriptions, serial numbers, and purchase receipts. High-quality photographs of each item are also highly recommended. Keep this documentation readily accessible, both physically and digitally, in case of a claim. Understanding the claim process is equally vital.
Most insurers require you to file a claim within a specified timeframe after the incident, providing detailed information about the loss or damage and supporting documentation, such as police reports in case of theft. The claims process can vary significantly between providers, with some offering quicker processing times and more streamlined procedures than others. This information should be clearly Artikeld in the policy documents.
Travel Photography Tips and Techniques
Mastering travel photography involves more than just pointing and shooting. It’s about understanding light, composition, and storytelling to create images that evoke emotion and capture the essence of a place. This section delves into advanced techniques to elevate your travel photography from snapshots to stunning works of art.
Understanding Light and its Impact on Photography
Light is the fundamental element in photography. The quality of light dramatically influences the mood and impact of your images. Harsh midday sun often creates high contrast and strong shadows, while the soft light of dawn or dusk (the “golden hour” and “blue hour”) offers a more diffused and flattering illumination. Learning to identify and utilize different types of light—front lighting, side lighting, backlighting—will significantly improve your photos.
For example, backlighting can create silhouettes, adding a dramatic effect, while side lighting can accentuate texture and depth. Experiment with shooting during different times of day to observe how light transforms the scene.
Mastering Compositional Techniques
Strong composition is key to captivating photographs. The rule of thirds, leading lines, and negative space are fundamental concepts. However, advanced techniques involve understanding visual weight, symmetry, and pattern. For instance, strategically placing your subject off-center, according to the rule of thirds, creates a more dynamic and engaging image. Using leading lines—like a road or river—can guide the viewer’s eye through the photograph, adding depth and narrative.
Employing negative space—the empty areas around your subject—can emphasize your subject and create a sense of calm or isolation. Consider the impact of various compositional elements and experiment with different approaches to find what best suits your vision.
Storytelling Through Photography
Travel photography is more than just capturing pretty pictures; it’s about telling a story. Consider the narrative you want to convey. Are you focusing on the landscape, the culture, or the people? Think about how you can use elements within the frame to support your story. For example, including people in your landscapes can add scale and context, while focusing on details can reveal aspects of the local culture.
The arrangement of elements and the choice of subject matter all contribute to the overall narrative. A successful travel photograph often communicates more than just a visual representation; it evokes a feeling, a memory, or a story.
Advanced Techniques: Depth of Field and Focus
Controlling depth of field is crucial for emphasizing your subject and managing the background. A shallow depth of field (small aperture, like f/1.4 to f/2.8) blurs the background, isolating your subject and drawing the viewer’s eye. Conversely, a large depth of field (large aperture, like f/8 to f/16) keeps both the foreground and background in sharp focus, useful for landscapes or architectural photography.
Mastering these techniques will significantly impact the visual impact and focus of your images.
Using Filters to Enhance Your Photography
Neutral density (ND) filters reduce the amount of light entering the lens, allowing you to use slower shutter speeds for smoother water or create a dreamy effect. Polarizing filters reduce glare and reflections, enhancing color saturation and contrast, particularly beneficial for landscapes and skies. Graduated neutral density (GND) filters darken a portion of the image, balancing exposure between a bright sky and a darker foreground.
Experimenting with these filters can dramatically improve the quality and creative possibilities of your photographs.
Post-Processing Techniques for Enhancing Images
Post-processing is not about creating artificial images; it’s about refining and enhancing what you captured. Tools like Adobe Lightroom and Photoshop allow you to adjust exposure, contrast, white balance, and sharpness, bringing out the best in your images. Learn to subtly adjust these settings to improve your photos without making them look unnatural. Selective adjustments, such as dodging and burning, can further refine details and draw attention to specific areas.
Shooting in RAW Format
Shooting in RAW format provides significantly more flexibility during post-processing. RAW files contain more image data than JPEGs, giving you greater control over adjustments such as exposure, white balance, and contrast. While RAW files require more storage space and processing power, the superior quality and editing capabilities make it worthwhile for serious travel photographers.
Experimenting with Different Perspectives
Don’t be afraid to experiment with different viewpoints. Get down low, climb high, or shoot from unusual angles to create unique and compelling images. A different perspective can dramatically change the look and feel of a photograph, adding a fresh and creative element. Consider the impact of your perspective on the overall composition and storytelling.
Utilizing Leading Lines and Framing
Leading lines, as mentioned earlier, guide the viewer’s eye through the image. These could be roads, rivers, fences, or even shadows. Framing involves using elements within the scene—like doorways, arches, or trees—to naturally frame your subject, creating a more visually appealing composition. These techniques add depth, interest, and a sense of narrative to your photographs.
Understanding and Utilizing Different Photography Styles
Explore different photographic styles to expand your creative expression. Experiment with minimalist photography, focusing on simplicity and clean lines. Try capturing candid moments to showcase the authenticity of a location. Learn to utilize street photography techniques to capture the energy and atmosphere of a place. By exploring diverse styles, you can develop a unique and versatile approach to travel photography.
Visa Requirements for Travel Photography
International travel for photography often necessitates navigating visa regulations, a crucial aspect of planning any successful photography tour. Understanding the specific requirements for your destination is paramount to avoid delays or denied entry. This section Artikels the visa processes for five diverse countries, highlighting key considerations for photographers.
The process of obtaining a visa varies significantly depending on your nationality and the country you plan to visit. Generally, it involves completing an application form, providing supporting documentation (such as proof of travel insurance and itinerary), and paying the applicable fees. Processing times can range from a few days to several weeks, so it’s crucial to apply well in advance of your planned trip.
Visa Requirements for the United States
Obtaining a US visa for tourism or photography typically involves applying for a B-1/B-2 visitor visa. Applicants must demonstrate a clear purpose of visit, sufficient funds to cover their expenses, and strong ties to their home country ensuring their return. The application process involves completing Form DS-160 online, scheduling an interview at a US embassy or consulate, and submitting supporting documentation.
Processing times vary but can take several weeks.
Visa Requirements for Canada
Canadian visa requirements for photographers largely depend on the applicant’s citizenship. Many nationalities can enter Canada visa-free for tourism purposes under the eTA (Electronic Travel Authorization) program. However, others require a visitor visa, necessitating a similar application process to the US visa, including completing an online application, providing supporting documentation, and potentially attending an interview.
Visa Requirements for Australia
Photographers traveling to Australia for tourism purposes typically require a tourist visa (subclass 600). This involves applying online through the Department of Home Affairs website, providing supporting documentation such as proof of funds, travel itinerary, and a letter of invitation if applicable. Processing times can vary significantly.
Visa Requirements for the United Kingdom
The UK visa requirements for photographers depend on their nationality and the purpose of their visit. Many nationalities require a Standard Visitor visa, which allows for tourism and photography activities for a limited duration. The application involves completing an online application form, providing biometric information (fingerprints and photograph), and paying the visa fee. Processing times are generally several weeks.
Visa Requirements for Japan
Japan offers a streamlined visa process for many nationalities, with a focus on tourism. Many visitors can obtain a temporary visitor visa upon arrival at the airport, subject to meeting certain entry requirements, including holding a valid passport and onward travel arrangements. However, some nationalities require applying for a visa in advance through the nearest Japanese embassy or consulate.
This process typically involves completing an application form, providing supporting documentation, and attending an interview.
Urban Escapes for Photography
Urban environments offer a rich tapestry of photographic opportunities, from the bustling energy of crowded streets to the quiet contemplation of hidden alleyways. The diversity of subjects, architectural styles, and human interactions provides endless possibilities for capturing compelling images. This section will explore three unique urban settings ideal for street photography, highlighting their specific photographic advantages and offering practical tips for navigating these dynamic environments.
Three Unique Urban Environments for Street Photography
Three distinct urban environments stand out for their unique photographic potential: Tokyo, Japan; New Orleans, Louisiana; and Buenos Aires, Argentina. Each offers a different visual and cultural experience, presenting photographers with a variety of challenges and opportunities.Tokyo’s vibrant Shibuya Crossing, for instance, offers a dynamic spectacle of controlled chaos, perfect for capturing the energy of a massive pedestrian crossing.
The blend of traditional and modern architecture provides a stunning backdrop, while the diverse crowd offers a fascinating array of subjects. New Orleans’ French Quarter, with its colorful buildings, wrought-iron balconies, and lively street performers, offers a more intimate and textured environment, ideal for capturing candid moments and atmospheric scenes. The city’s unique blend of cultures and its relaxed atmosphere make it an inviting place to photograph.
Finally, Buenos Aires’ La Boca neighborhood, with its brightly painted houses and passionate tango dancers, offers a vibrant and energetic atmosphere perfect for capturing both candid moments and carefully composed shots. The architectural details and the intensity of the local culture make it a photographer’s dream.
Photographic Tips for Urban Environments
Successfully capturing compelling images in urban environments requires careful consideration of several factors. Managing crowds is crucial; patience is key. Instead of trying to force a shot, wait for moments of calm or for interesting interactions to unfold naturally. Using a fast shutter speed helps freeze motion and avoid blurry images in crowded areas. A wide-aperture lens can help isolate subjects from busy backgrounds, while a longer lens allows for discreet observation from a distance, ideal for capturing candid moments without intruding.
Mastering the art of anticipation is essential; learn to predict movements and position yourself strategically to capture fleeting moments of interest. This includes understanding the flow of pedestrian traffic and positioning oneself to capture dynamic compositions. Consider the use of leading lines, such as streets or railway tracks, to guide the viewer’s eye through the image and create a sense of depth and movement.
Finally, always be mindful of the local customs and regulations; respect the privacy of individuals and obtain permission before photographing people in situations where it may be considered intrusive.
Vacation Packages for Photographers
Photographers seeking to combine their passion with leisure often find specially designed vacation packages a compelling option. These packages cater to the specific needs and desires of photographers, offering a blend of breathtaking locations, expert guidance, and convenient logistics, ultimately enhancing the photographic experience. They differ significantly from generic travel packages, focusing on maximizing opportunities for capturing stunning images.These packages offer a range of benefits, exceeding what a typical vacation provides.
They often include pre-arranged access to unique locations, expert instruction from professional photographers, and logistical support such as equipment transport and accommodation tailored to photographic needs. This holistic approach ensures photographers can focus on their craft without the distractions of planning and logistics.
Types of Photographer Vacation Packages
Various vacation packages cater to different photographic styles and experience levels. Some packages focus on wildlife photography in national parks, offering guided safaris and prime viewing spots. Others might concentrate on landscape photography in stunning mountain ranges or coastal regions, providing access to iconic viewpoints and optimal lighting conditions. Still others may be urban-focused, exploring the architectural wonders and street scenes of major cities worldwide.
The choice depends on the photographer’s individual preferences and skill level. For example, a beginner might opt for a package offering basic instruction and guided shoots, while a seasoned professional might prefer a more independent package focusing on access to exclusive locations.
Value Proposition Comparison: Different Package Options
The value proposition of different photography vacation packages varies considerably depending on several factors. Cost is a primary consideration, with packages ranging from budget-friendly options to luxury experiences. Budget packages may offer fewer amenities and less personalized instruction, while luxury packages often include private transportation, high-end accommodation, and one-on-one tutoring from renowned photographers. The inclusion of equipment rental, post-processing workshops, or printing services also significantly impacts value.
For example, a package including equipment rental might be more appealing to photographers who don’t own specialized gear, while a package with post-processing workshops adds significant value for photographers seeking to enhance their skills. Ultimately, the best package depends on the photographer’s budget, skill level, and desired outcomes.
Features of Photographer-Focused Vacation Packages
A key feature of these packages is their focus on maximizing photographic opportunities. This includes pre-arranged access to locations with exceptional photographic potential, taking into account factors like golden hour lighting, optimal weather conditions, and minimal crowds. Many packages incorporate expert guidance from professional photographers, providing personalized instruction, feedback, and mentoring. This personalized attention can greatly improve a photographer’s skills and confidence.
Logistical support, such as equipment transport and accommodation suitable for photographers (e.g., with ample space for gear and editing), further enhances the experience, allowing photographers to concentrate on their work. Some packages even include curated itineraries designed to capture a specific theme or style of photography. For instance, a package focused on astrophotography might include visits to dark sky locations and instruction on night photography techniques.
Venture Capital in the Travel Photography Industry
The travel photography industry, while seemingly niche, presents compelling opportunities for venture capital investment. The convergence of growing global tourism, increasing accessibility to high-quality photography equipment, and the insatiable appetite for visually engaging content creates a fertile ground for innovative business models. This sector is ripe for disruption, offering investors a chance to capitalize on both established trends and emerging technologies.The burgeoning demand for curated travel experiences and professional photography instruction provides significant potential for return on investment.
Moreover, the increasing reliance on visual storytelling across various platforms – from social media to marketing campaigns – fuels the need for high-quality travel photography, further strengthening the industry’s investment appeal.
Innovative Businesses Attracting Investment
Several innovative business models within the travel photography sector are currently attracting significant attention from venture capitalists. These models leverage technology and cater to the evolving needs of both professional photographers and amateur enthusiasts. The potential for scalability and profitability makes them particularly attractive investment prospects.
AI-Powered Photo Enhancement and Editing Platforms
One area ripe for investment is the development of AI-powered platforms designed to enhance and edit travel photography. These platforms could offer automated features like background removal, object enhancement, and stylistic adjustments, significantly reducing the post-processing time for photographers. Imagine a platform that could instantly identify and correct common photographic flaws, or even suggest optimal composition adjustments, all through the power of artificial intelligence.
This could lead to increased productivity and efficiency for professionals, and provide accessible editing tools for amateurs. A successful platform in this area would likely command a substantial market share.
Personalized Travel Photography Itineraries and Guided Tours
Another promising area involves the creation of personalized travel photography itineraries and guided tours. These services would cater to specific photographic interests and skill levels, offering bespoke experiences that cater to individual needs. For example, a company could offer a week-long tour focused solely on capturing wildlife photography in Tanzania, or a weekend workshop teaching astrophotography in the Namib Desert.
The key is creating niche offerings that tap into specific photography passions, creating highly valuable and unique experiences. This model combines travel and photography expertise, creating a premium offering with high profit margins.
Subscription-Based Photography Education Platforms
The online learning market is booming, and the travel photography niche is no exception. Subscription-based platforms offering comprehensive courses, tutorials, and feedback from professional photographers could attract significant investment. These platforms could feature interactive lessons, live Q&A sessions, and community forums, fostering a sense of community and continuous learning. A successful platform would leverage technology to deliver high-quality education at scale, attracting a large subscriber base and generating recurring revenue.
Examples of similar successful subscription models in other fields demonstrate the viability of this approach.
Embarking on a travel photography tour or workshop is an investment in both your skills and your passion. By carefully considering the factors Artikeld in this guide—from destination selection and workshop type to essential gear and travel planning—you can create a truly enriching and rewarding experience. Remember to prioritize your safety and the preservation of your equipment, and most importantly, allow yourself to be inspired by the beauty and diversity of the world around you.
The journey itself is as rewarding as the final images.
FAQ Section
What is the best time of year to go on a travel photography tour?
The best time depends heavily on the destination and the type of photography you’re interested in. Research the specific location’s weather patterns and peak seasons for optimal lighting and conditions.
How do I choose the right workshop for my skill level?
Many workshops cater to different skill levels (beginner, intermediate, advanced). Carefully review the curriculum and prerequisites to ensure it aligns with your experience and goals.
What kind of insurance do I need for my photography equipment?
Comprehensive travel insurance is essential, including specific coverage for lost, stolen, or damaged photography equipment. Check the policy details carefully before purchasing.
Are there any group discounts for travel photography tours?
Some tour operators offer discounts for groups or bookings made well in advance. Inquire directly with the tour provider to check for available discounts.


